Designing Commercial Video Surveillance for Low Light
Design low-light commercial video around motion, exposure, lighting, IR, WDR and recorded-footage tests instead of daytime demonstrations.
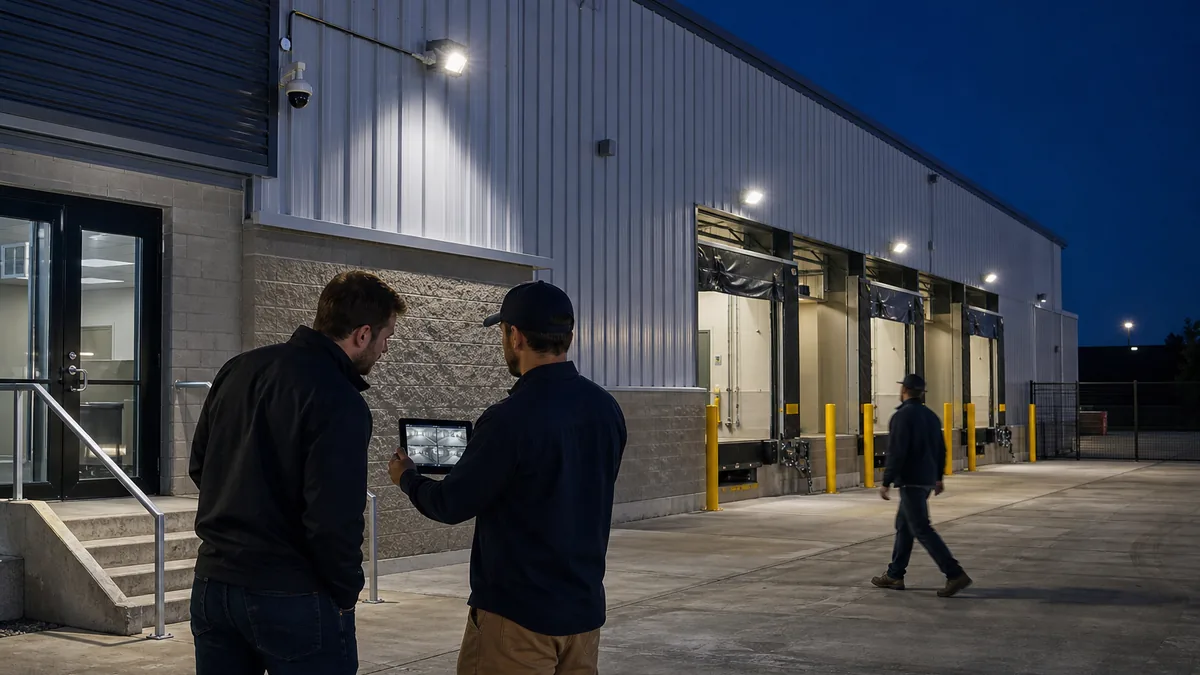
A daytime camera demonstration cannot prove that the same view will capture useful evidence after dark. At night, a camera may brighten an empty scene with a long exposure while a moving face, hand or vehicle becomes a blur. Headlights, loading-bay doors, snow, wet pavement, reflective clothing and infrared bounce can create a second set of failures.
Facilities and security designers should begin with the moving subject, target location and decision the recording must support. Then design the camera, lens, lighting, exposure limits, field of view and recording settings as one system. Acceptance should use exported recorded footage made under representative nighttime conditions, with realistic motion at the required target plane.
This article provides that design and commissioning framework. It is focused specifically on low-light image performance, complementing the broader commercial camera coverage survey used to establish purposes, views and infrastructure.
1. Define the nighttime evidence task first
“Good night vision” has no repeatable pass condition. Write an observable task for every critical view:
- determine that a person crossed a perimeter;
- understand activity around a loading door;
- recognize a person previously seen at an employee entrance;
- capture identifying detail at a constrained access point; or
- document the sequence of a vehicle entering, stopping and leaving.
Record the target plane, subject direction, expected speed, closest and farthest useful distance, required colour information, common obstructions and likely source of glare. A loading-yard overview and a face view at a controlled entrance have different jobs. They may need separate cameras or lighting zones.
Identify the darkest normal condition and the transition conditions. Exterior lights may be dimmed after business hours. Motion-activated fixtures may take time to reach output. An open dock door can place a bright interior behind a dark outdoor subject. Vehicle headlights can change the exposure as the decisive event occurs.
The resulting requirement should describe evidence, not a product label. For example: “At the employee entrance, exported video must show a normally walking subject with the approved recognition detail throughout the marked approach during the darkest scheduled lighting state.”
2. Treat exposure as a motion decision
Low-light imaging balances exposure time, aperture, gain, noise reduction, frame rate and available light. Changing one variable can improve an empty scene while weakening moving evidence.
| Control | Possible benefit | Failure to check |
|---|---|---|
| Longer exposure | Brighter stationary scene | Motion blur or ghost-like subject detail |
| Wider aperture | More light reaches the sensor | Reduced depth of field or optical softness |
| Higher gain | Brighter image without extending exposure as much | Noise, lost fine detail and higher bitrate |
| Strong noise reduction | Cleaner-looking background | Smearing or disappearing moving detail |
| More illumination | Supports shorter exposure and lower gain | Glare, uneven coverage, privacy or operational impact |
| Higher frame rate | More temporal samples | Less exposure time available per frame and greater recording demand |
Set a maximum exposure time from the movement that matters, then determine whether the scene supplies enough light to achieve the required result. Avoid choosing exposure from an empty still frame. A person should walk, turn, present a credential or handle an object at normal speed during the test.
Review the recorded stream used for evidence. A live view can use a different stream, bitrate or client presentation. Export the relevant segment and inspect individual frames around the decisive movement without relying on digital zoom to create missing detail.
3. Design lighting and field of view together
The light reflected from the subject reaches the camera. A meter reading at the ground or a bright wall does not establish useful illumination on a face, vehicle or handled item at the target plane.
Axis Communications explains in its lighting guide for network video that image performance depends on the quantity, quality and distribution of available light. It also explains that illumination should match the camera field of view and that a bright area can reduce performance elsewhere in a dark scene. This is manufacturer-authored guidance, so validate the principle with the exact proposed camera and lighting equipment.
During design, document:
- the lighting source, schedule and control owner;
- light direction at the subject rather than only at the mounting wall;
- uniformity across the required scene;
- the illuminator angle compared with the camera field of view;
- bright fixtures, headlights, windows and reflective surfaces in the image;
- shadows created by canopies, vehicles, racks or landscaping;
- the effect of rain, snow, wet pavement, dust and seasonal changes; and
- maintenance access for fixtures, camera windows and domes.
A narrow beam inside a wide view can produce a bright centre and dark edges. A beam wider than the useful view spreads energy outside the target area. Distance matters sharply because light spreads as it travels. Test the farthest target and the nearest reflective subject, since a design that reaches the back of a yard can overexpose a person close to the camera.
The Royal Canadian Mounted Police Security Lighting Considerations Guide warns that some lighting can produce visible image pulsing when camera frame capture and the power-driven light output do not align. It also discusses different reflectance under infrared and maintenance issues from camera-integrated IR outdoors. The guide was written for Government of Canada physical security and should be adapted through a site-specific commercial design.
4. Choose colour, infrared or thermal by purpose
Visible white light can preserve colour information that helps distinguish clothing, vehicles, packages or process states. It can also support safe circulation and provide a visible deterrent. Added light may affect neighbours, drivers, occupants, energy use and the site’s desired appearance.
Near-infrared illumination can support monochrome video where visible lighting is unsuitable. The camera, lens and illuminator must work together. Check focus after the day-to-night switch, uniformity across the view, close-object overexposure and reflection from walls, soffits, glass, domes, water, snow, dust and spider webs.
The Axis technical paper on infrared in surveillance explains that extreme low light can require added near-infrared illumination for visual cameras and that IR should cover the full field without overexposing nearby objects. It also identifies reflection risks from nearby surfaces and debris. Its product examples are specific to Axis, so use the installed manufacturer’s documentation for final configuration and maintenance.
Thermal cameras sense heat radiation and can support presence detection in darkness. Their output and purpose differ from normal visual video. A thermal view used to detect a person does not automatically provide the visual detail needed to recognize or identify that person. A design can combine detection and visual verification where the operating need supports it.
Choose the mode explicitly for each view:
| Evidence requirement | Design question |
|---|---|
| Colour is operationally important | Can approved visible lighting provide accurate, stable colour through the required period? |
| Discreet monochrome detail is sufficient | Can IR cover the target plane evenly without reflection, focus shift or nearby overexposure? |
| Presence detection is the primary task | Would thermal detection plus a separate visual verification view serve the workflow? |
| Conditions vary throughout the night | Are switching thresholds, exposure limits and both day and night focus states tested? |
5. Control glare and wide dynamic range trade-offs
Entrances, parking garages and loading areas often contain bright and dark regions in the same frame. Wide dynamic range processing can preserve detail across those regions, but its performance depends on the scene, motion and processing method.
Axis’s wide dynamic range technical paper explains that multi-exposure methods can introduce motion blur, ghosting, flicker and noise because a moving subject occupies different positions during sequential captures. It also cautions that a dynamic-range number alone does not express overall image usability. These are general imaging trade-offs described by a manufacturer, not a universal ranking of camera models.
Design the scene before relying on WDR:
- avoid placing an unshielded fixture directly in the camera view;
- adjust camera direction or target location to reduce avoidable contrast;
- separate overview and identification tasks where one exposure cannot serve both;
- coordinate door, canopy and vehicle lighting with the required view;
- test WDR modes with the fastest expected movement; and
- check recovery when headlights or a door opening suddenly changes the scene.
Record the chosen WDR and exposure settings. Automatic modes can respond differently after firmware updates, lighting changes or seasonal conditions. A commissioning record provides a baseline for later inspection.
6. Specify the complete recorded-video path
Low-light image quality can be lost after the sensor. Noise creates changing detail that is difficult to compress and can increase bitrate or produce block artifacts. Recorder profiles, variable bitrate limits, frame rate, resolution, keyframe interval and playback transcoding all affect the evidence available to an investigator.
For each critical view, document:
- exact camera and lens;
- day and night mode behaviour;
- exposure limit, gain and noise-reduction settings;
- WDR mode;
- illumination type, aim, output and schedule;
- resolution, frame rate, codec, bitrate control and recording stream;
- expected storage effect during representative low-light activity;
- recorder, client and export method; and
- approved configuration backup and change owner.
ONVIF Profile T supports interoperable capabilities including video streaming, imaging settings, metadata, and motion and tampering events. Conformance still requires feature-level verification. Confirm that the selected recorder can read, apply and retain every required imaging setting for the exact camera and firmware combination.
Include low-light bandwidth and storage measurements in the commercial security camera architecture. A quiet daytime wall is a weak basis for sizing a view that contains night noise, precipitation, moving trees or regular vehicle traffic.
7. Protect privacy while improving night performance
Increasing illumination or changing camera aim can expand what a system captures. A brighter background may reveal neighbouring property or people outside the stated purpose. A visible-light fixture can also affect occupants and surrounding sites even when the camera view remains unchanged.
The Office of the Privacy Commissioner of Canada’s private-sector overt video-surveillance guidance recommends establishing a business reason, considering less privacy-invasive alternatives, limiting viewing range, providing notice and periodically evaluating the system. The guidance excludes covert and employee surveillance, and applicable law depends on the organization and context.
For every night-mode change:
- confirm that camera aim and digital privacy masks remain correct in both modes;
- check whether IR or visible light reaches beyond the intended scene;
- verify that automatic exposure does not reveal an unnecessary background;
- document notice, viewing, export, retention and deletion controls; and
- route employee-monitoring or other heightened concerns for appropriate legal and privacy review.
Useful nighttime evidence and data minimization should be designed together. A tighter view at a controlled choke point can provide better subject detail while collecting less unrelated activity than a bright, ultra-wide overview.
8. Run a recorded-motion acceptance test
Commission each critical view during representative darkness. Repeat the test for material lighting states, including normal scheduled lighting, open doors, vehicle headlights and motion-triggered changes. Include adverse weather or make it a documented seasonal follow-up where safe and practical.
Use this sequence:
- Record ambient conditions, fixture state, camera settings and software versions.
- Place the subject at each required target plane using ordinary clothing or a representative vehicle.
- Perform the actual movement, such as walking, turning, presenting a credential, handling a parcel or driving through the lane.
- Introduce expected glare, backlight and obstruction conditions.
- Retrieve and export the recording through the normal investigation workflow.
- Assess motion sharpness, required detail, focus, exposure recovery, noise, compression, colour or monochrome result and timestamp.
- Verify privacy masks, view boundaries, access rights and retention settings.
- Save the result, approved configuration and any unresolved seasonal test.
Define pass or fail before the demonstration. Avoid accepting a carefully selected still image. Review the decisive moving sequence and several nearby frames. If the result fails, the correction may involve lighting, subject angle, focal length, camera position, exposure limit, bitrate or a separate choke-point view.
9. Ask vendors questions that expose the trade-offs
Use procurement questions that require evidence:
- Under which exposure, lens, frame-rate and processing conditions was the low-light claim measured?
- What maximum exposure will be used for the actual subject speed?
- How will motion blur be tested in the exported recording?
- Which WDR artifacts can appear with movement or LED lighting?
- How are day-to-night switching, focus and colour requirements controlled?
- What illumination pattern reaches the required target plane, and what happens to a nearby reflective subject?
- How will rain, snow, wet pavement, glass, dust and spider webs affect the view?
- Does the recorder retain every required imaging setting through restart and firmware change?
- How does low-light scene noise affect measured bitrate and retention?
- Which privacy and lighting boundaries will be tested after dark?
- Who owns seasonal retesting, cleaning, lighting changes and configuration drift?
The strongest proposal ties each answer to a drawing, view schedule, setting, test method and accountable owner. Integrate those requirements into the broader commercial security system plan so camera performance, site lighting, networks, storage, privacy and maintenance remain coordinated.
A reliable low-light design proves moving evidence under the conditions that matter. Securitron Canada can help commercial facilities define nighttime camera objectives, test scenes and document acceptance requirements across the GTA.
Frequently Asked Questions
The camera may be using a longer exposure to brighten a dark scene. Stationary walls remain clear while a moving face, hand or plate travels across the sensor during the exposure and becomes blurred. Test recorded video with realistic movement at the required target distance.
No. Lux claims may use different conditions, lenses, exposure times and image-quality thresholds. Compare the exact camera, lens, settings and recorder in the intended scene using a moving subject and the required evidence objective.
Choose from the evidence need and operating context. White light can preserve useful colour and support people using the area. Infrared can provide discreet monochrome imaging where visible light is unsuitable. Test beam coverage, reflections, subject distance, privacy, safety and maintenance for either choice.
Review exported recorded footage from representative darkness, motion, weather, glare and lighting states. Confirm the required subject detail, motion sharpness, exposure recovery, focus, colour or monochrome result, compression quality, privacy boundaries and repeatability. Save the approved settings and test evidence.